While English remains the international language of commerce, the internet speaks a lot of languages. Thus, building your website only in English means that you are missing out on a lot of opportunities for connecting with a broader audience.
The good thing is that Drupal offers excellent multilingual capabilities, ensuring that your website is accessible to the widest possible audience. In this post, https://beehosting.pro/ will walk you through setting up a multilingual Drupal site. At the end of this process, you will have a fully functional Drupal multilingual website.
Here are the steps involved in the process:
- Modules checklist and activation
- Add language
- Add prefix language code
- Download translation package
- Import the language
- Activate language switcher block
- Enable multilingual support
Modules Checklist and Activation
The following modules are required throughout this setup:
- Local (integrated with the core)
- Content translation (integrated with the core)
- Internationalization (link: https://www.drupal.org/project/i18n) (Download and activate)
- Variable (link: https://www.drupal.org/project/variable) (Download and activate)
Add Language
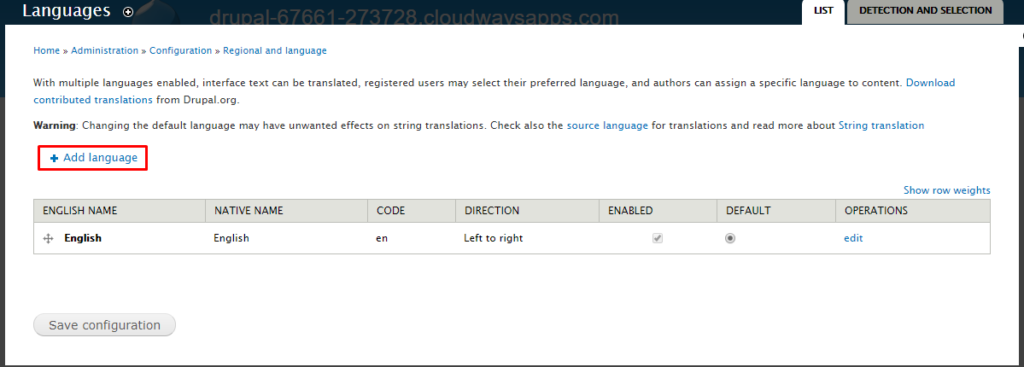
Navigate to the languages section in Admin > Config > Regional > Languages.
Add a new language from here:
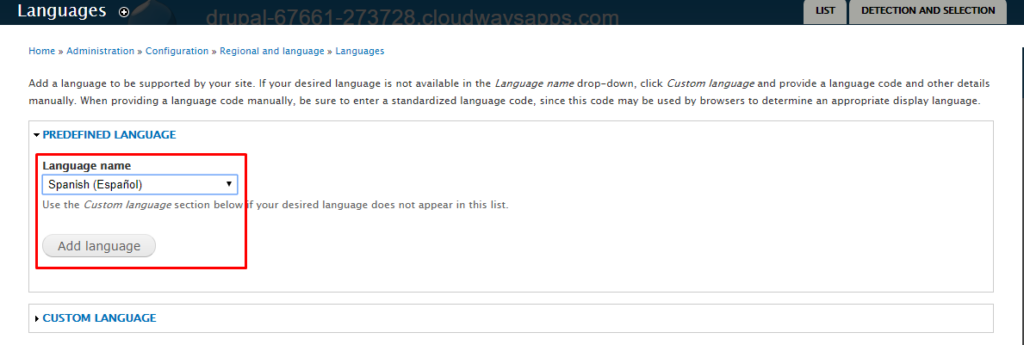
For the purpose of this tutorial, I will add Spanish:
Add Prefix Language Code
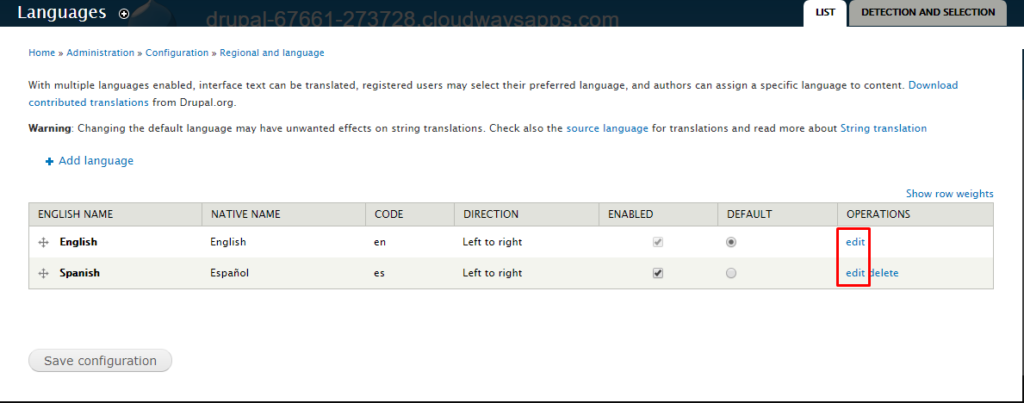
Now edit each language to add a prefix, e.g. ‘en’ for English and ‘es’ for Spanish. Note that it is usually preferable to leave the default prefix unchanged, otherwise, the existing nodes will cause issues because of changed links. In that case, export the nodes before assigning prefixes and then import them back again.
Navigate to the ‘Detection and Selection’ tab on the same window , and check the ‘URL’ option.
Download Translation Package
Access the following Drupal translation (link: https://localize.drupal.org/) page and download the package for the language you added in the previous step.
Import Language Package
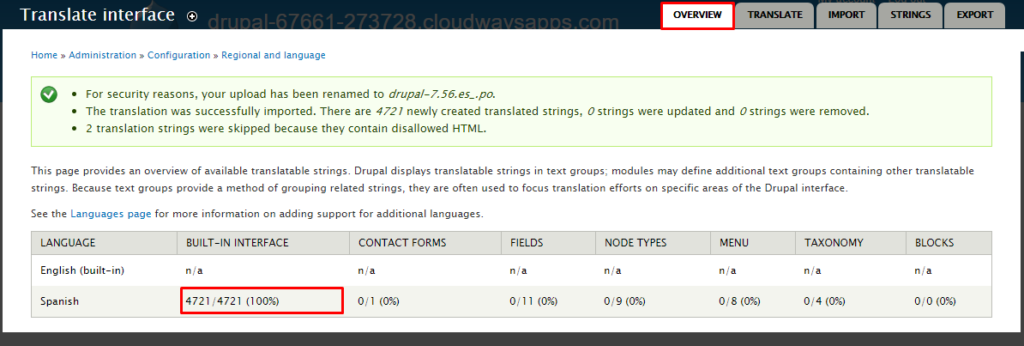
Now head over to admin > config > Regional > Translate and import the language package that you downloaded in the last step. You will also need to import packages for other modules and enable them in the same way.
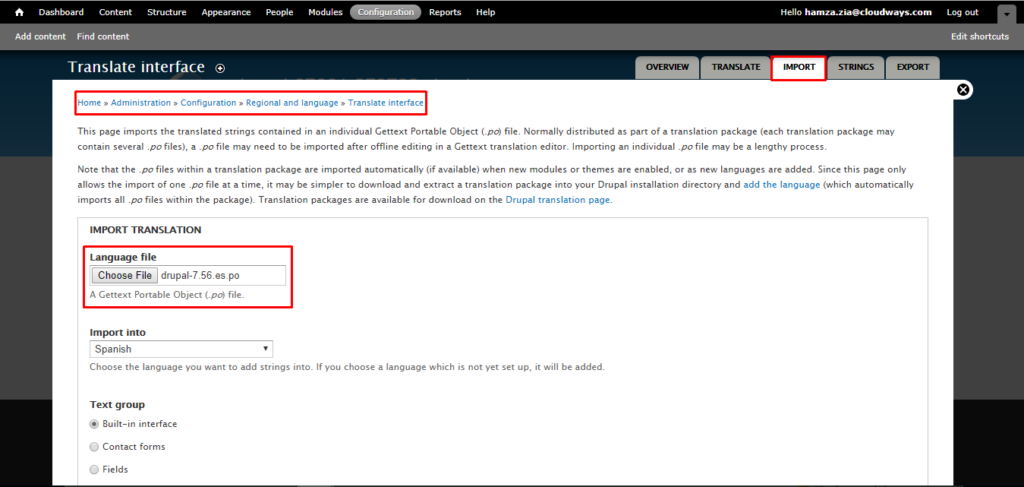
After the import completes, go to the overview tab where you can monitor the percentage of the website that has been translated.
Activate Language Switcher Block
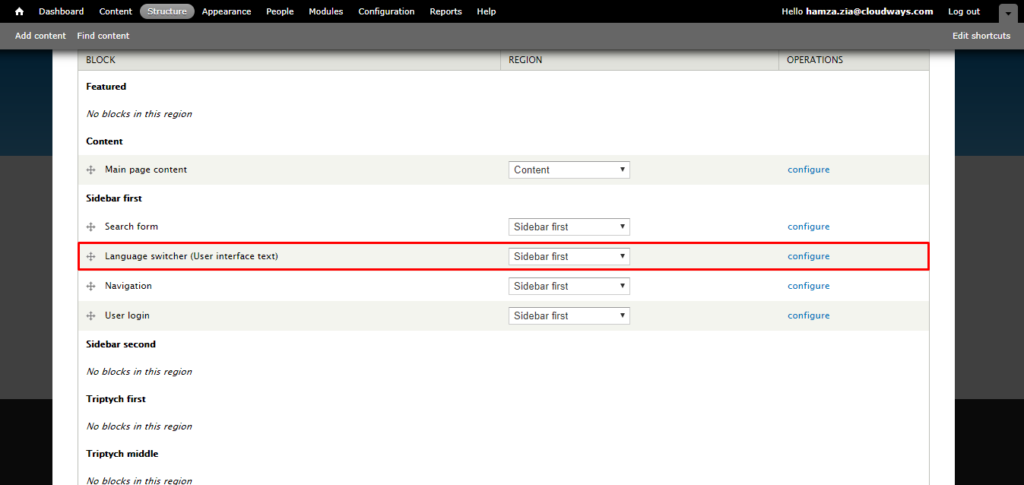
Now that the translations have been successfully downloaded and imported, I will next provide the users a way of switching between the two languages. For this purpose, I will add a block which will allow the users to do just that. Navigate to Admin > Structure > Block. Go through the list and find ‘Language Switcher’. Set it to a section of your choice and click Save Blocks at the end of the page.
Enable Multilingual Support
Next, I will enable the support of multi language for all content types. For the purpose of this tutorial, I will enable support for this post. Go to Admin > Structure > Types > Manage > Article. Click on ‘Publishing options’ and enable the radio button marked ‘Enabled, with translation’. Click Save when done. Do this for every content type that requires language translation.
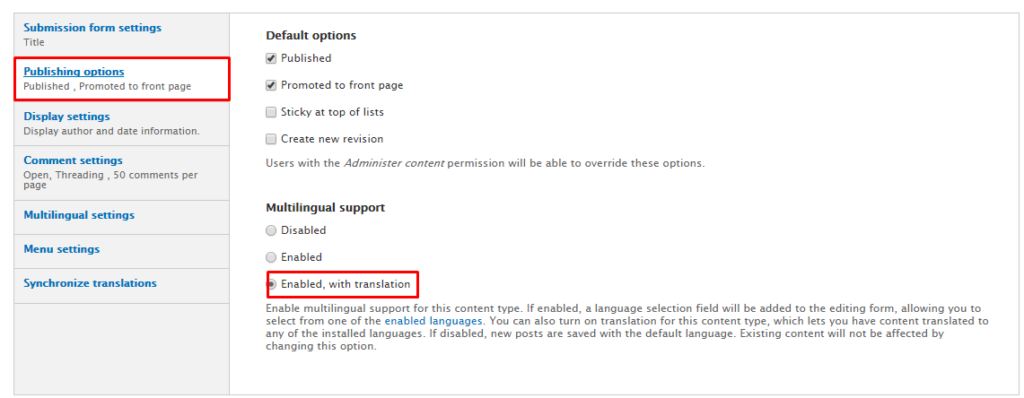
Now, whenever you publish an article, you can select the display language. If you select ‘Language Neutral’, it will always be displayed in the language it was created.


