This guide will demonstrate how to import your installation into Softaculous. There are two methods available for importing your installations into Softaculous.
Importing specific installations
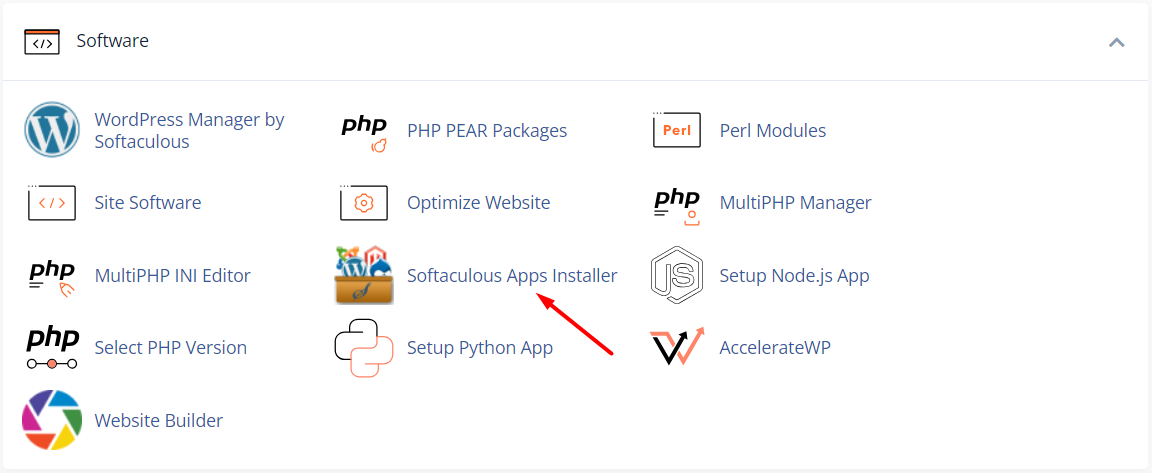
1. Login to cPanel. 2. Under the Software section, click on Softaculous Apps Installer.

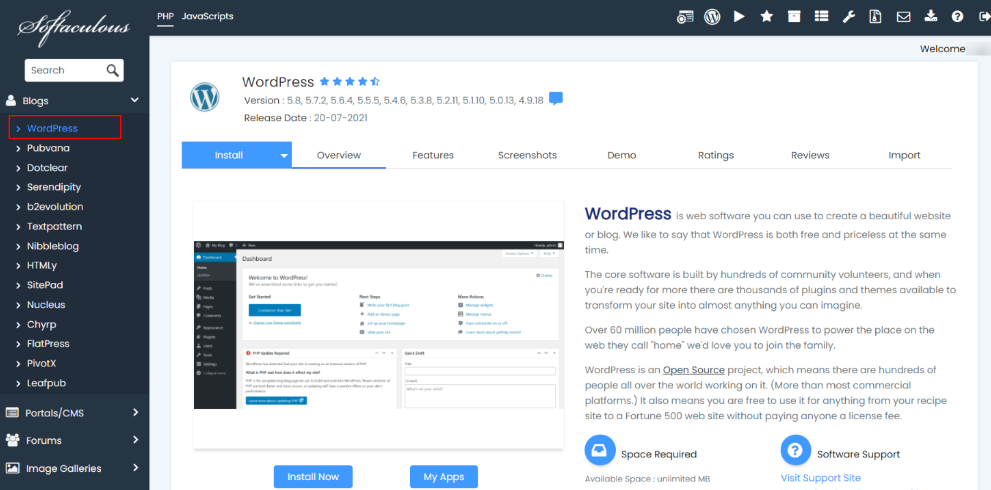
3. Choose the content management system (CMS) used for your website. 4. In our illustration, WordPress has been chosen. Now, click on the Import tab.

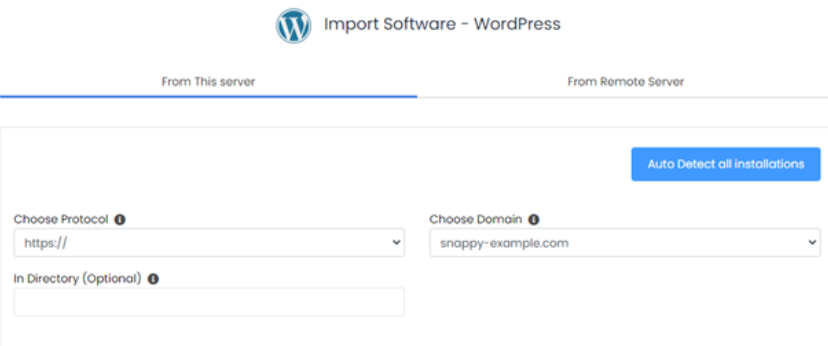
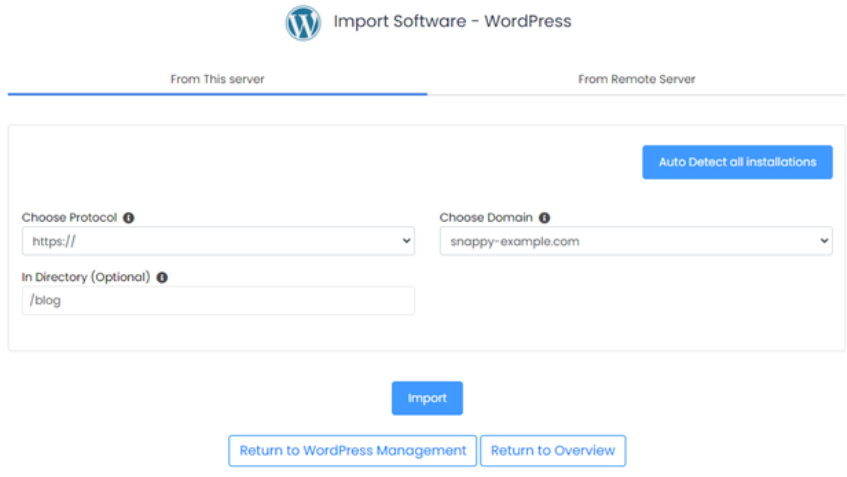
The screen will show you three options: A. Choose Protocol: Pick the appropriate protocol for your website. HTTPS: If your site is SSL-enabled. HTTP: If your site doesn’t have SSL. B. Choose Domain: Indicate the domain where the software is presently installed. C. In Directory: Specify the directory in which the software is installed. If you’ve installed the software in the public_html directory, you can leave this field empty. However, if the installation is within a subdirectory, enter the name of that directory. Please refer to the screenshots below: The software is installed in the public_html directory.

Software is installed in a subdirectory.

6. Click the Import button. After completing this step, your software will be imported into Softaculous, enabling you to manage tasks such as backups and creating staging sites for the installation.
Importing multiple installations
1. Log in to cPanel. 2. Under the Software section, click on Softaculous Apps Installer.

3. Click on the Import Installations icon located in the upper-right corner of your homepage. This action will initiate a scan for installations from other tools.

4. You have the option to choose Manual Installations and then initiate a scan to detect any supported software that has been manually installed.


