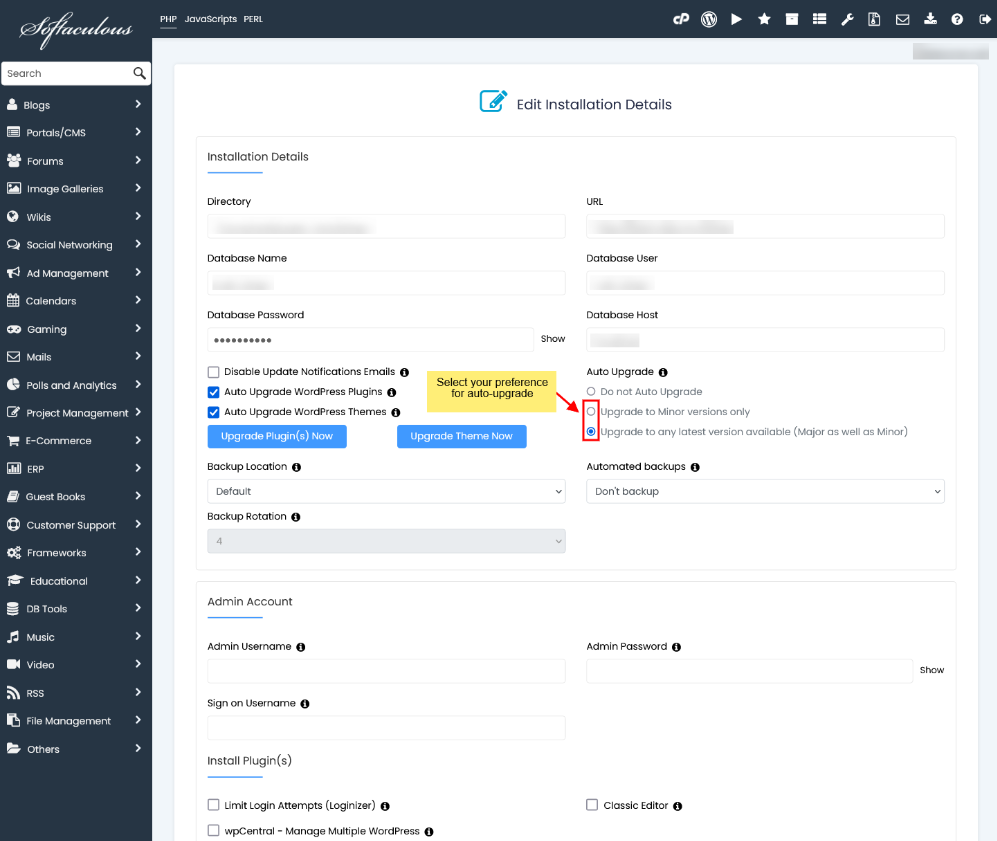
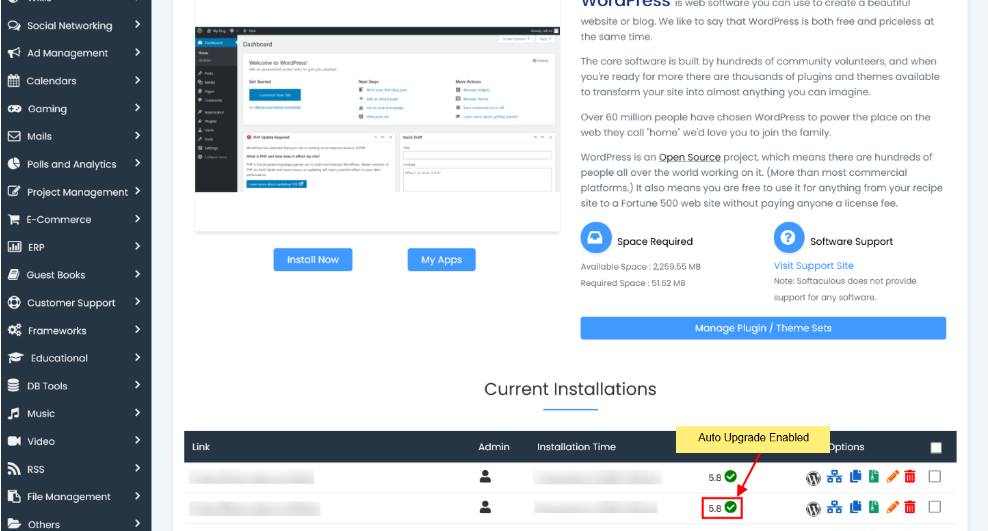
The upcoming guide will demonstrate how to activate automatic upgrades for your installations through the Softaculous Enduser panel. By enabling auto upgrades for specific installations, they will be automatically updated via CRON as soon as the latest version becomes accessible in Softaculous. NOTE: The Auto Upgrade feature is available in Softaculous 4.2.1 and higher. NOTE: This functionality is currently limited to specific scripts. Additional scripts will be included in this feature in the near future.
List of scripts with auto upgrade functionality
You can review the list of scripts equipped with auto-upgrade functionality here: http://www.softaculous.com/softaculous/auto_upgrade
Enable Auto Upgrade for new installations
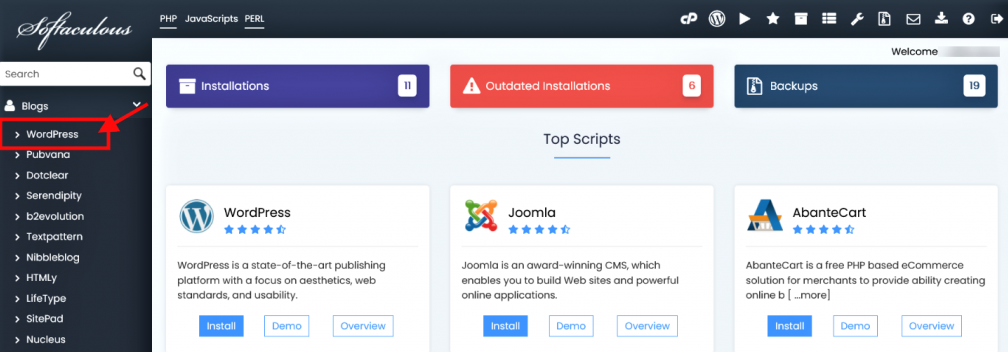
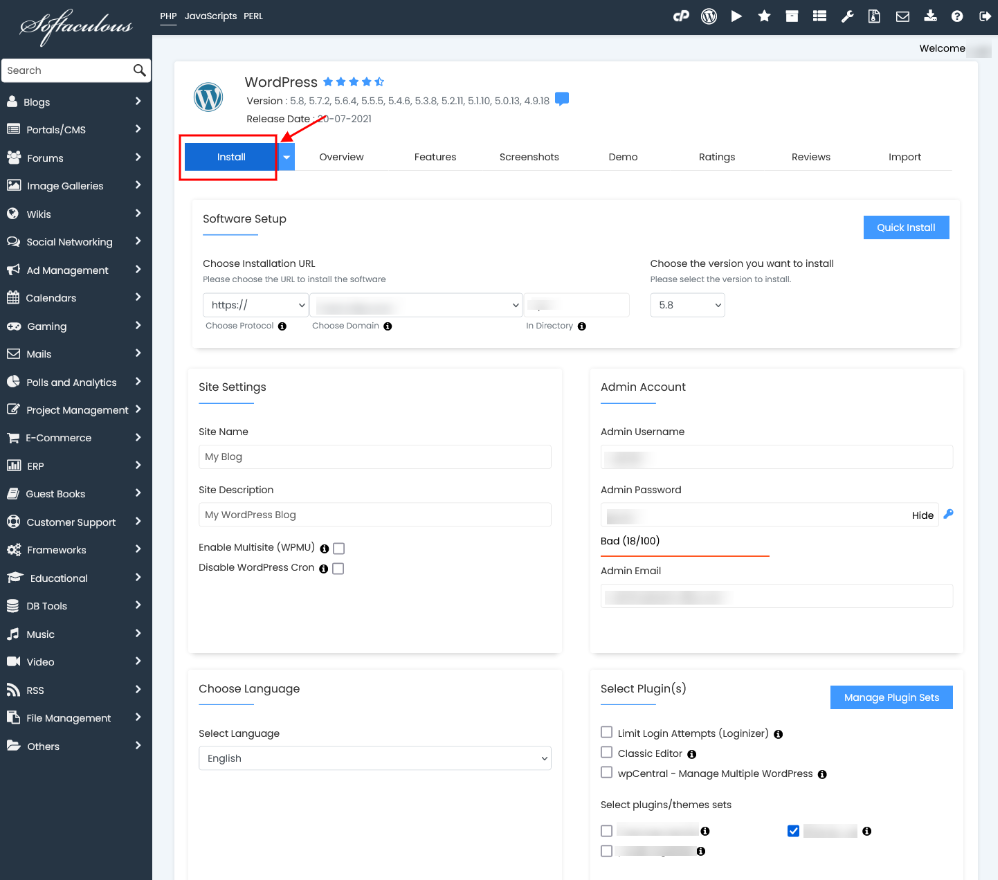
You have the option to activate auto upgrade for an installation during the Softaculous installation process. 1. Choose the script you want to install.
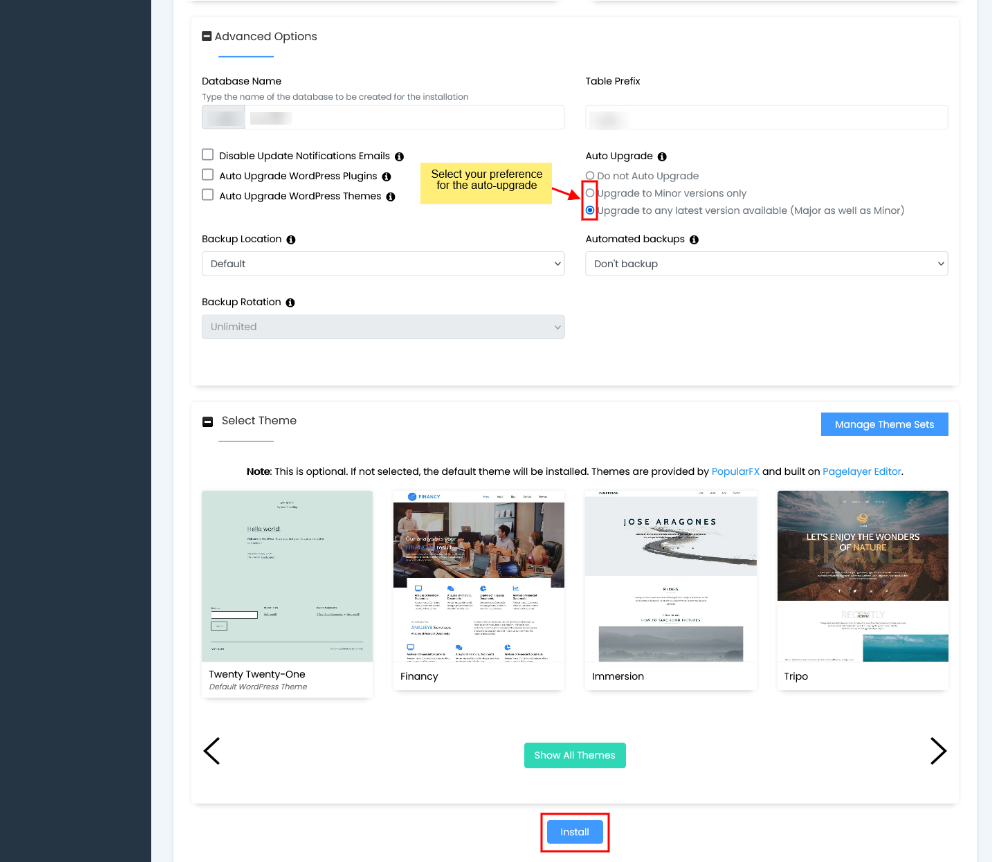
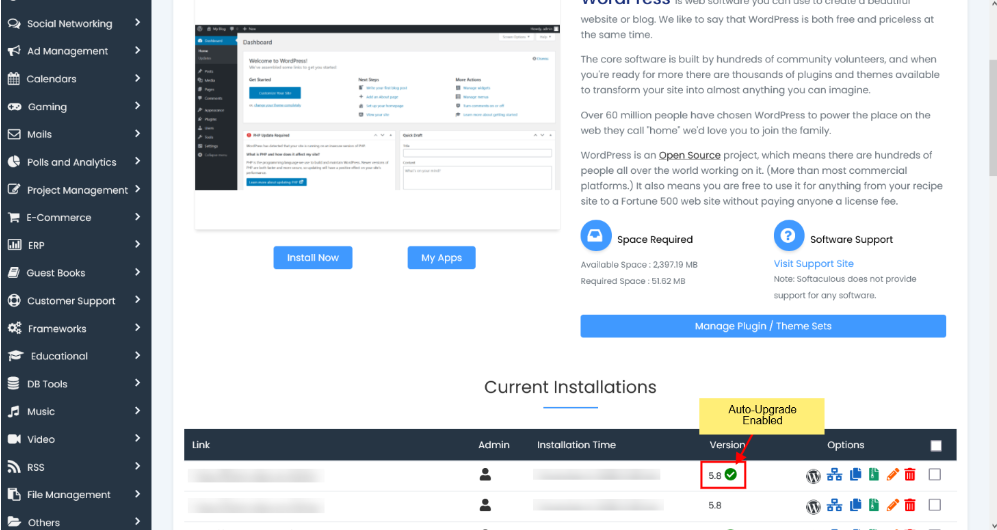
Your installation will be automatically upgraded once the new version becomes available in Softaculous.
Enable Auto Upgrade for existing installations
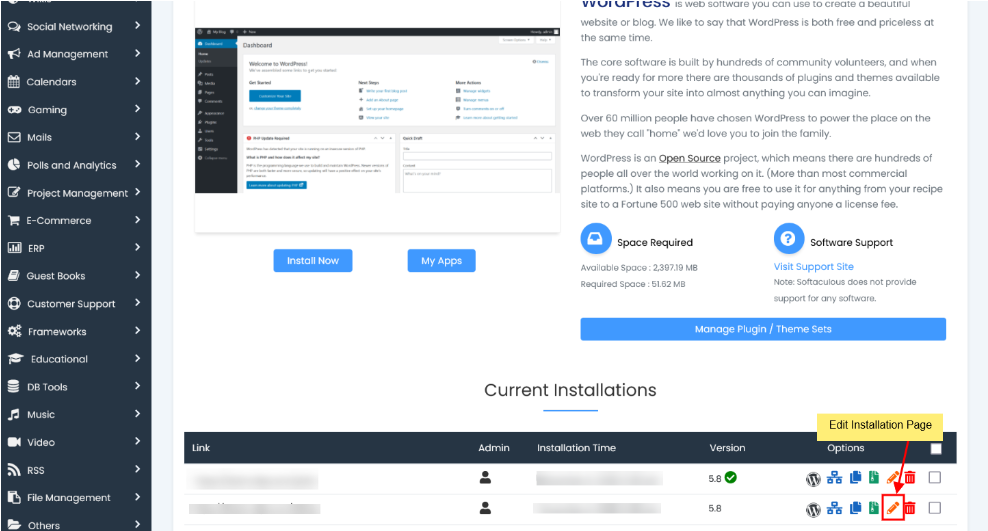
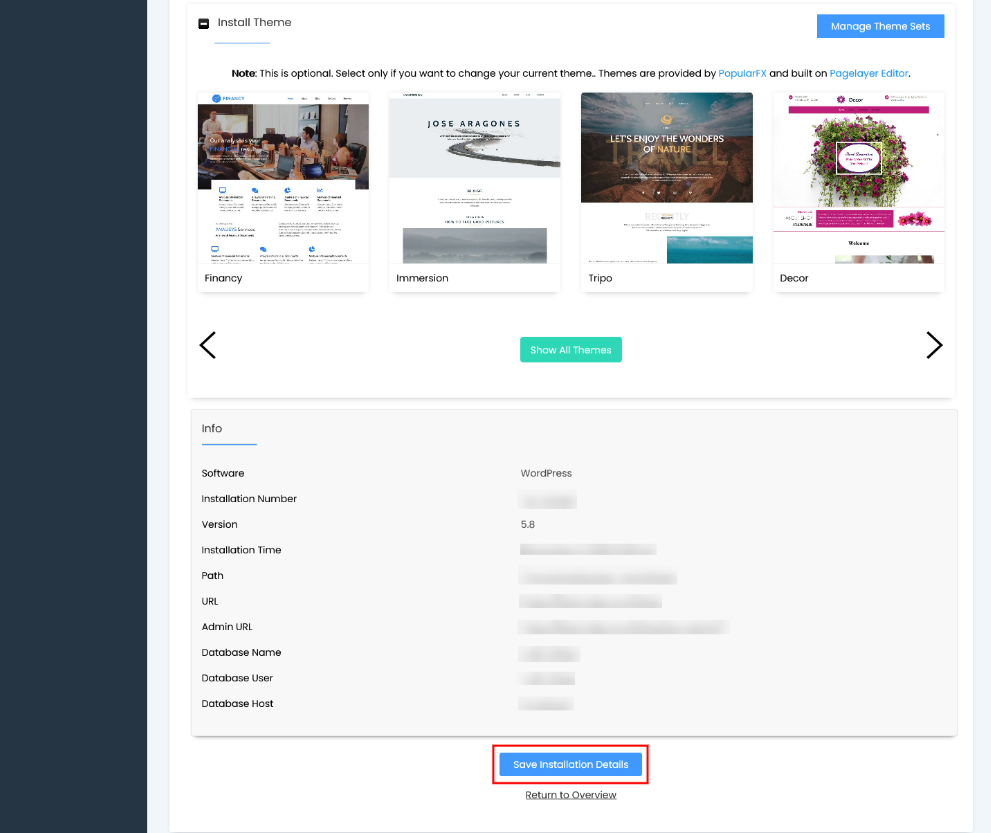
You can also activate auto upgrades for existing installations. 1. Access the installation editing page.
