Generating a CSR is the first step you must perform in order to apply for an SSL Certificate.
Generating a CSR
Step 1: Log in to your client area
Step 2: Choose in the Services your SSL service
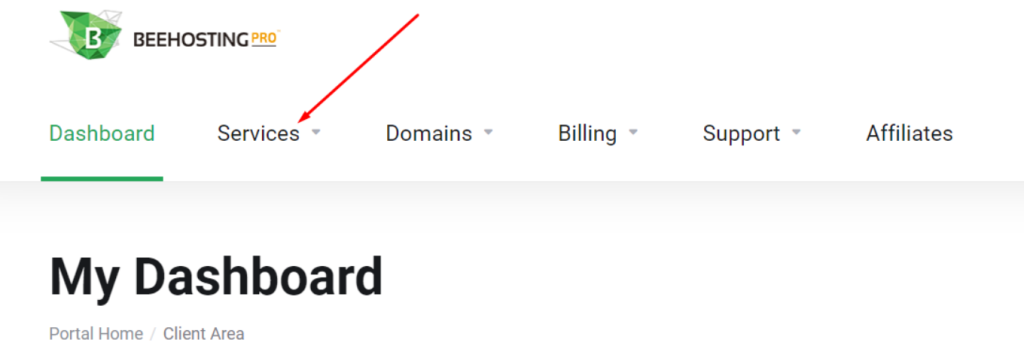
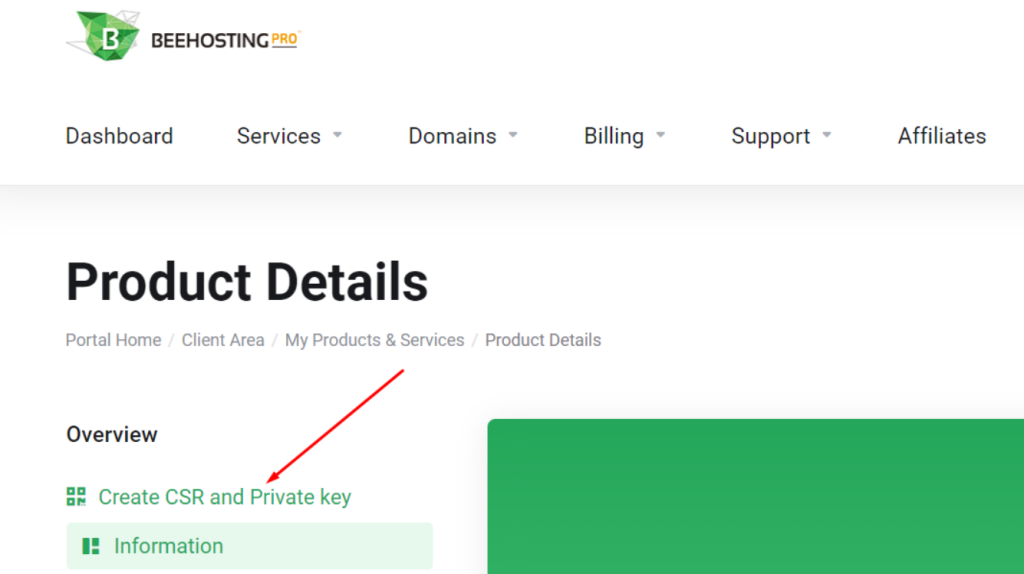
Step 3: Click to Create CSR and Private Key
Step 4: In the window that appears enter the following details about your website and organization
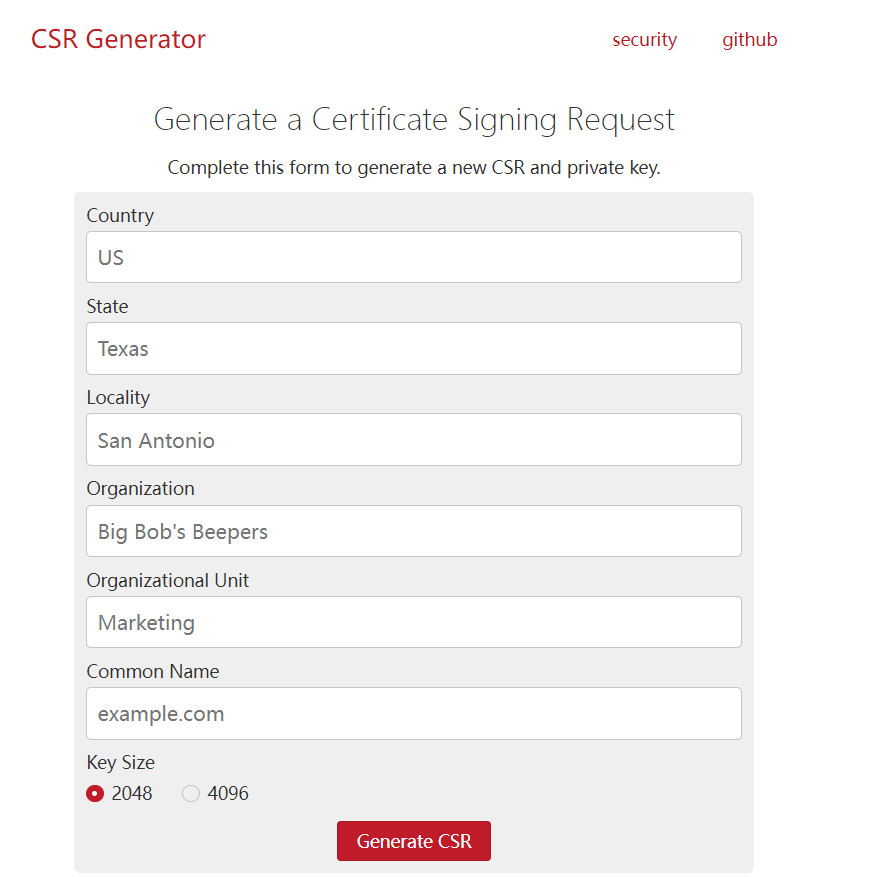
- Organizational unit: This describes the type of your organization. For e.g. Sole Proprietorship, Government Department, Public (Listed) Company, Private (Unlisted) Company, etc.
- Common Name: This is the domain name for which you have purchased the SSL Certificate.
NOTE
- The Common Name should match the domain name of the order. If you have purchased the SSL Certificate for yourdomain.com, you need to enter yourdomain.com as the Common Name.
- For wildcard certificates, enter the Common Name as *.yourdomain.com. This means that the certificate will be issued for all sub-domains of yourdomain.com.
- The SSL Certificate issued will be valid for yourdomain.com as well as www.yourdomain.com.
Step 5: Click Generate CSR
You will receive an encoded file – your CSR. This CSR can now be used to submit your SSL Certificate application to the Certificate Authority.
Important
- When generating your CSR, ensure that you set the key size to 2048-bit or higher.
- If you get an error that says that the CSR is invalid, double-check the information entered while generating your CSR and generate a new CSR.
- Ensure that you keep your private key confidential.
Certificate enrollment
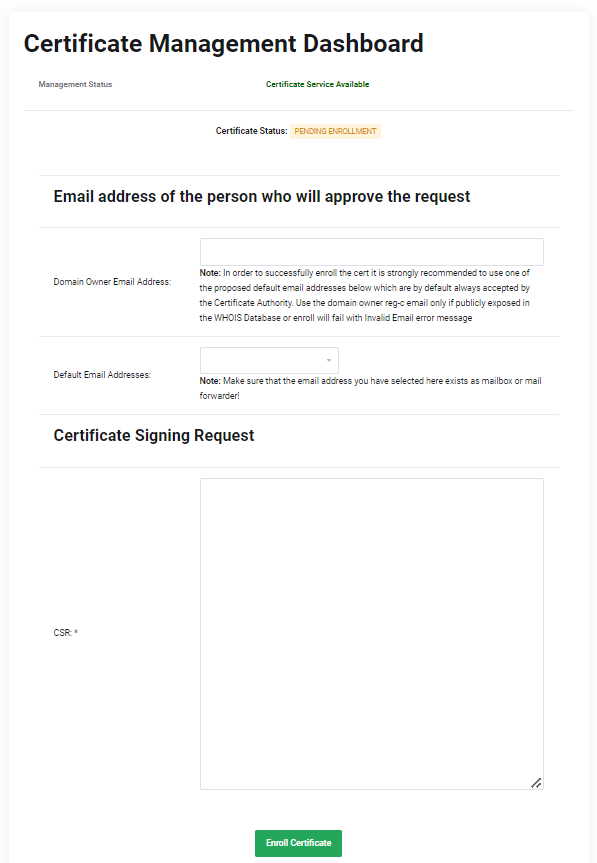
Step 1: In the client’s area open the Certificate Management Dashboard
Enter Domain Owner Email Address, Default Email Addresses, CSR and click Enroll certificate.
NOTE
- In order to successfully enroll the certificate, it is strongly recommended to use one of the proposed default email addresses below which are by default always accepted by the Certificate Authority.
moc.n1752239204iamod1752239204ruoy@1752239204nimda1752239204
moc.n1752239204iamod1752239204ruoy@1752239204rotar1752239204tsini1752239204mda1752239204
moc.n1752239204iamod1752239204ruoy@1752239204retsa1752239204mtsoh1752239204
moc.n1752239204iamod1752239204ruoy@1752239204retsa1752239204mtsop1752239204
moc.n1752239204iamod1752239204ruoy@1752239204retsa1752239204mbew1752239204
- Use the domain owner reg-c email only if publicly exposed in the WHOIS Database or enrolling will fail with an Invalid Email error message.
- The mailbox must be created in advance and be active.
Step 2: Go to the email address indicated in step 5 and approve the request
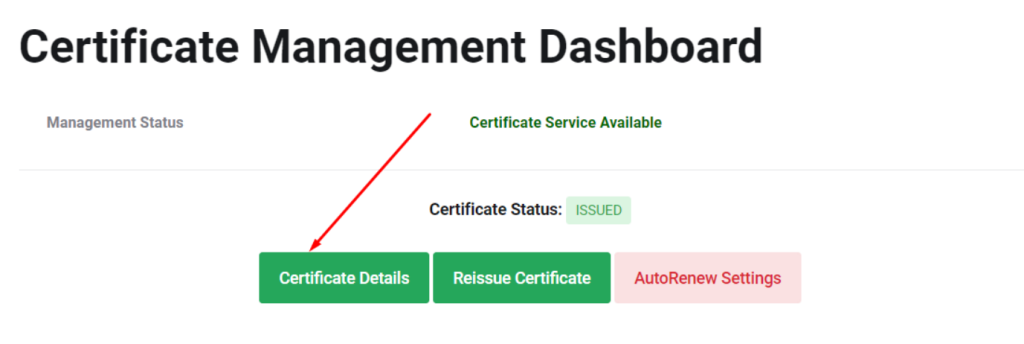
Step 3: After your SSL Certificate is issued it will be sending you by email. Also, you can view it in the client’s area
Looking for reliable protection for your site? Get the right level of website protection with our SSL options


