Using the Menu tool in Website Builder

Last modified: Friday December 1st, 2023

This article describes how to use the “Menu” tool in Website Builder.

Adding menu

  1. Drag and drop the menu from the main toolbar: Using the Menu tool in Website Builder drag and drop menu website builder 1024x215
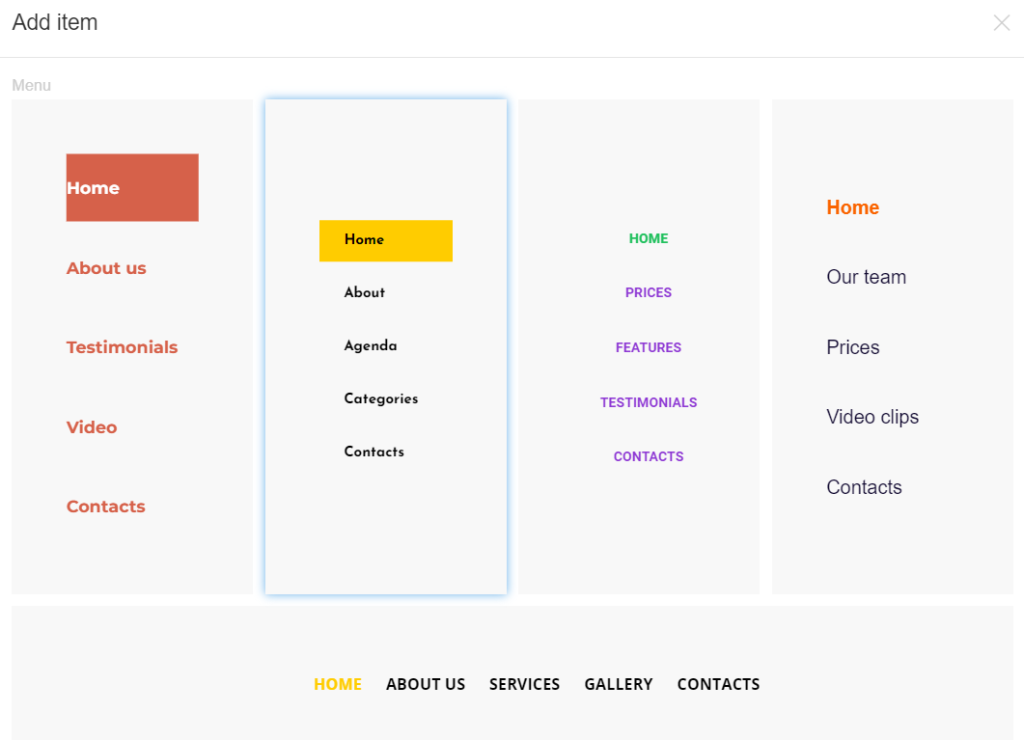
  2. In the window that appears, choose menu composition. Scroll to the bottom to see all available options:  Using the Menu tool in Website Builder menu variations website builder 1024x740
  3. Select the menu element and select “Edit menu” in the right toolbar: Using the Menu tool in Website Builder edit menu website builder 1 1024x229
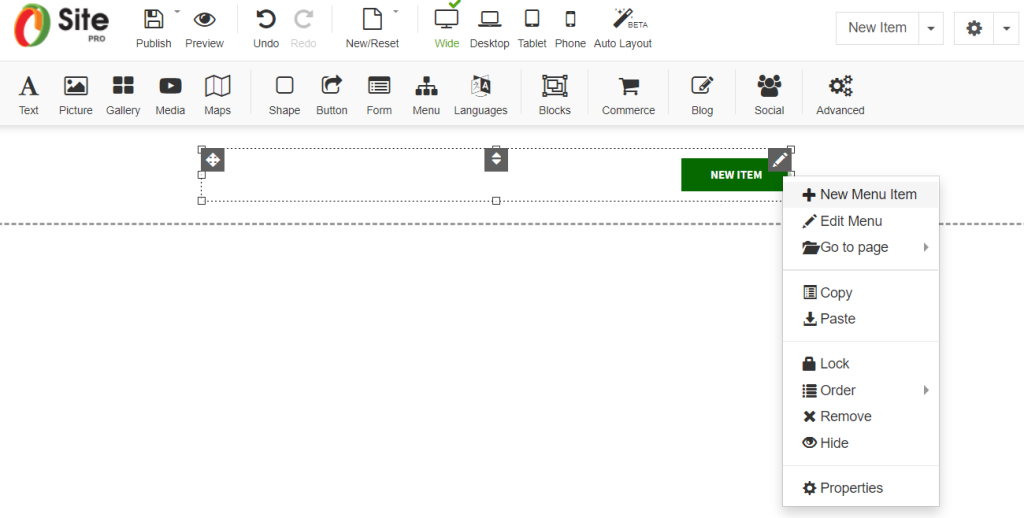
  4. Click “+New Item” to add the menu page: Using the Menu tool in Website Builder new menu item website builder 1024x518
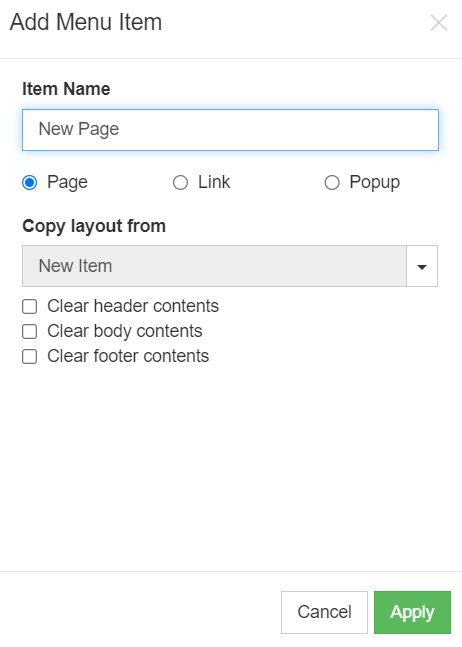
  5. Enter “Item Name”, select the type of menu element (e.g. “Page”), choose “Copy layout from” (e.g. Home), or leave clear content (e.g Body) and click “Apply”:                                    Using the Menu tool in Website Builder add menu item website builder
Customising Menu

  • Submenu: Drag your created element to your required location or on top of a menu element to create a submenu.


Build your own free professional website with Beehosting Website Builder.

Was this article helpful?
Views: 170

10 Years Beehosting!
Celebrate with 70% OFF + FREE Site Transfer.

Facebook Instagram linkedin

Beehosting.pro website uses cookies

We use cookies to personalise content and ads, to provide social media features and to analyse our traffic. We also share information about your use of our site with our social media, advertising and analytics partners who may combine it with other information that you’ve provided to them or that they’ve collected from your use of their services.

Menu