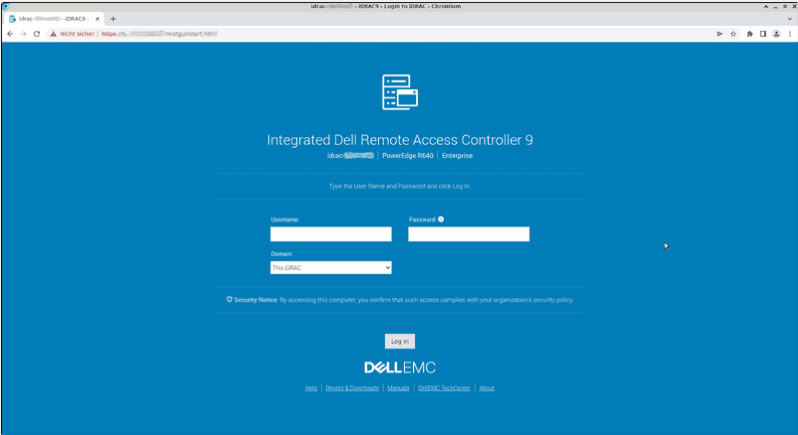
How do I connect to the iDRAC?
In the order completion mail, there are two IP addresses; one of them for the server itself and the other one for the iDRAC. There are also two logins: one for the server itself, and a second one, below that, for the iDRAC. (They are separate logins).
How do I change the iDRAC password?
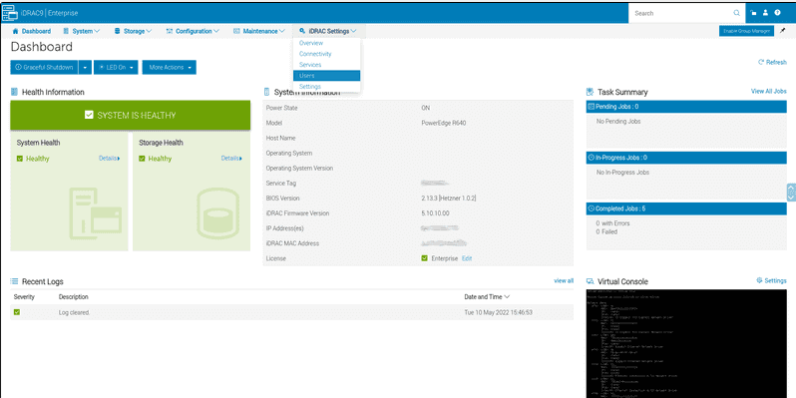
First, log into iDRAC and go to the menu iDRAC Settings and select Users. On the page that appears, expand the menu for Local Users.
Edit button.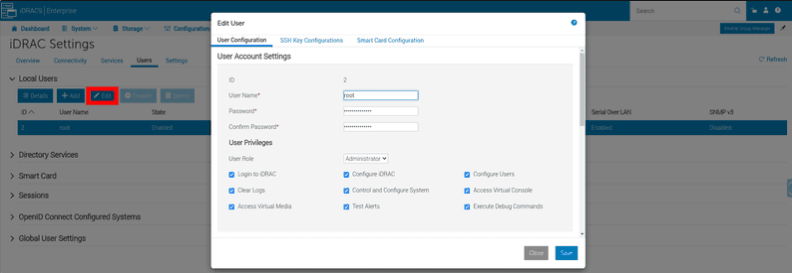
Save.
What is the KVM function and how do I use it?
The KVM function, more specifically the KVM over IP function, allows you to use the server over a network just as if you were directly in front of the machine with a screen, a keyboard, and a mouse directly attached. When you log onto the iDRAC, you see a preview of the current video output of the server on the bottom right third of the website.
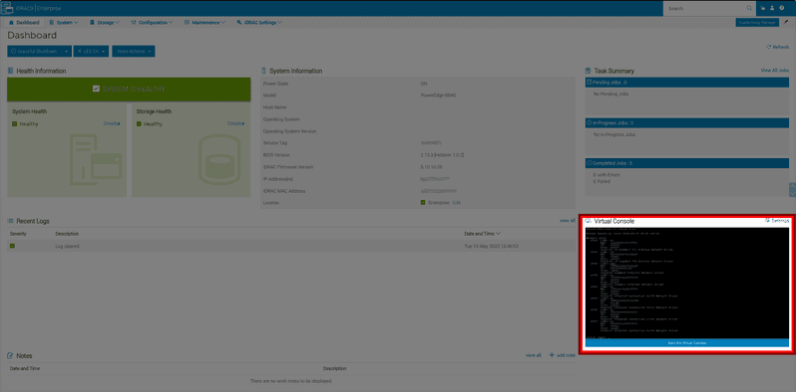
Launch Virtual Console below the preview and confirm the requests for pop-up windows for the iDRAC address, a new window opens first. In this window, you must add an exception for the SSL certificate. You will then be connected live and can operate the server just like any other computer. For special functions such as a reboot or to send certain key combinations (e.g. CTRL-ALT-DEL), use the menu Console Controls in this KVM window.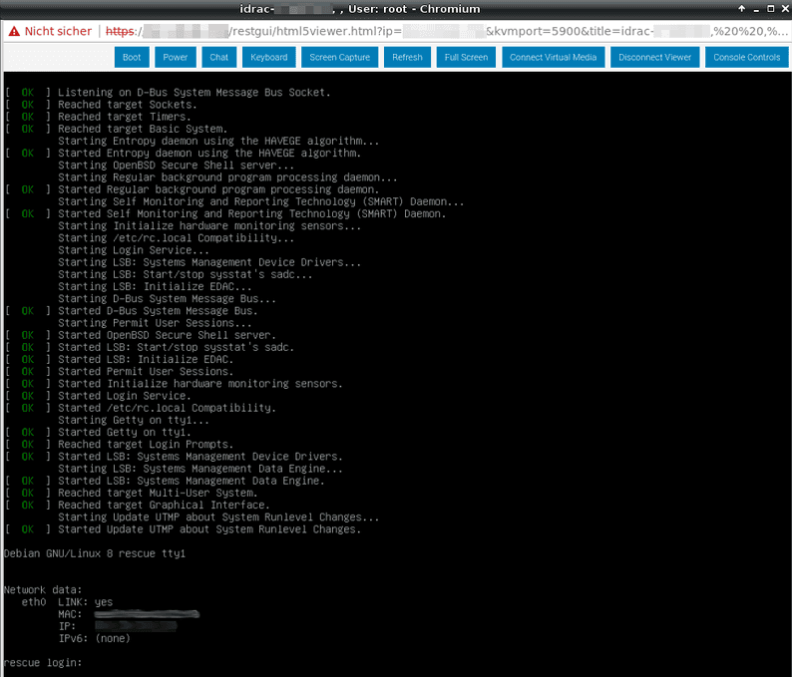
How do I configure the RAID controller?
The RAID controller is only able to use SSD drives, so NVMe drives will be not shown here First, log in to the iDRAC and select Overview in the upper menu under Storage.

Virtual Discs
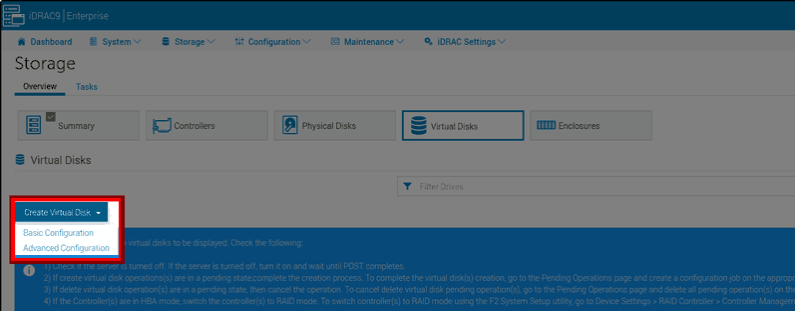
| Option | Short description |
|---|---|
| Basic | Quick creation of RAID layouts |
| Advanced | Ability to change read/write policies or to make other adjustments |
In this example, we used a system with two SSD drives, so we were only able to create RAID 0 or RAID 1. If you have installed more SSD drives, you can also create RAID 5, RAID 6, RAID 10, RAID 50 or RAID 60. You can now monitor the status of the process in the Job Queue. To do this, click on Maintenance in the top menu and then on Job Queue.
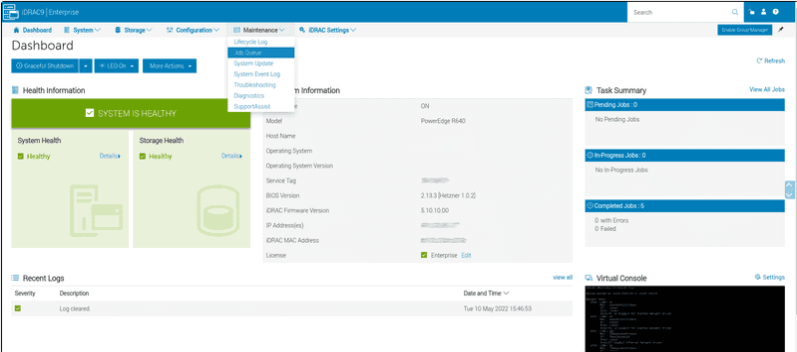
Completed, the logical drive should the be visible in the operating system and should be visible in the overview under the menu item Storage -> Overview -> Virtual Disks.
How do I mount an ISO image?
To do this, select the option Connect Virtual Media in the KVM window. Another window will appear in which you can directly select local drives or stream ISO images (CD/DVDs) to the server. If you have chosen one of the options and have selected a device/ISO, click on the corresponding Map Device button and finally on Close. The local drive/ISO should now appear in the operating system/boot menu.
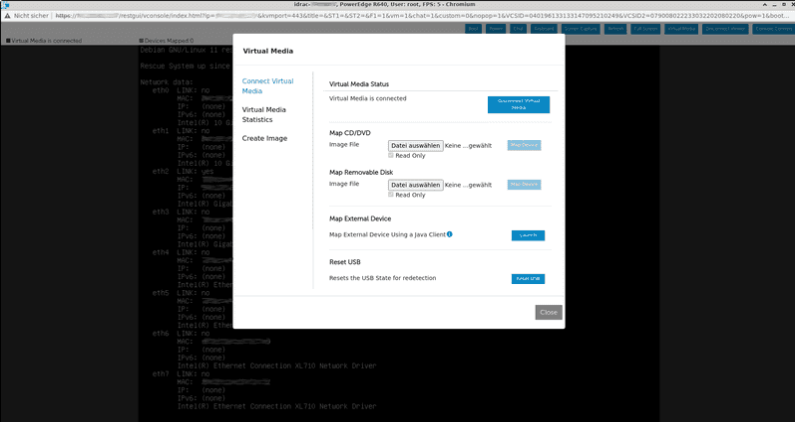
F11 to go to a boot menu when you see the message to press F11. An even easier way to boot from the image is to select the entry Virtual CD/DVD/ISO in the menu Next Boot on the KVM window.
Windows
Windows images are straight from Microsoft and don’t include any changes from us. They do not come with a license. You can use them to install a clean Windows OS on the server, which you can activate with your own license key.
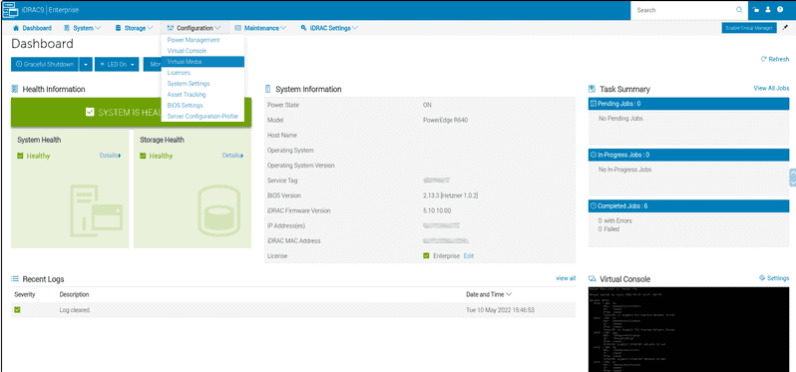
- You can leave the User Name and Password fields blank: you don’t need them.
- The iDRAC should now display the value
ConnectedunderConnection Status ... - Now you can set the next boot drive in the KVM window to
virtual CD/DVD/ISO. Or, you can also select the corresponding entry via the boot menu (F11) on the BIOS POST screen.
OS Deployment via the LCC (Lifecycle Controller)
Your DELL Server has an OS Deployment function that is integrated into your server’s lifecycle controller. This function provides the necessary drivers for the operating system and guides you with graphical wizards in creating a RAID array if there is no RAID alreadz on your server. DELL only supports certified operating systems via this function. These may vary from model to model. For an overview of the operating systems for your rented product, please visit the correct DELL website.
- R640 (DX152/DX292): https://www.dell.com/support/home/en-us/drivers/supportedos/poweredge-r640
- R6415 (DX180): https://www.dell.com/support/home/en-us/drivers/supportedos/poweredge-r6415
- R6515 (DX181): https://www.dell.com/support/home/en-us/drivers/supportedos/poweredge-r6515
If you would like to use the OS Deployment function, you must first choose an image from our mirror. As soon as you have chosen the image, you need to restart your server and boot it into the LCC by pressing F10 in the BIOS POST. The following example shows how to use the OS Deployment function with Windows Server 2016.
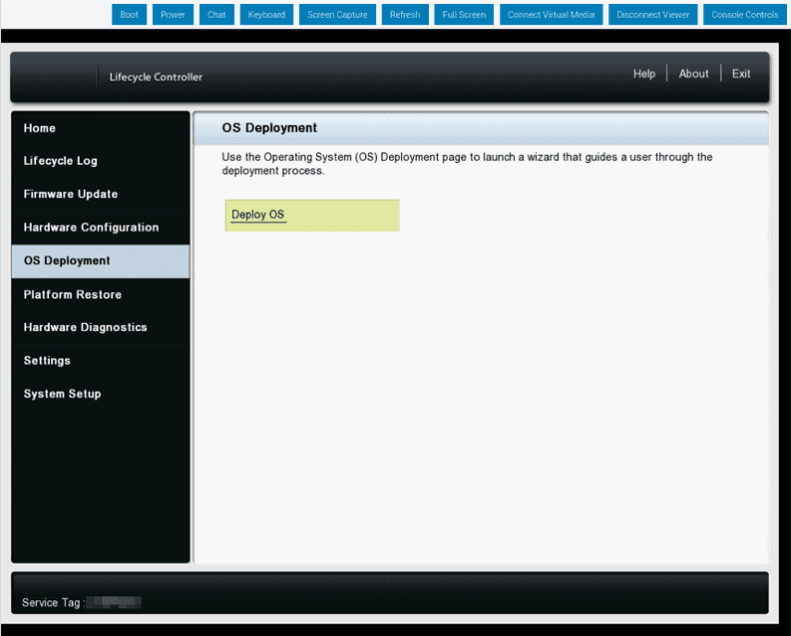
- When the server is booted up into the LCC, click on
OS Deploymentin the menu on the left side, and then onDeploy OS.
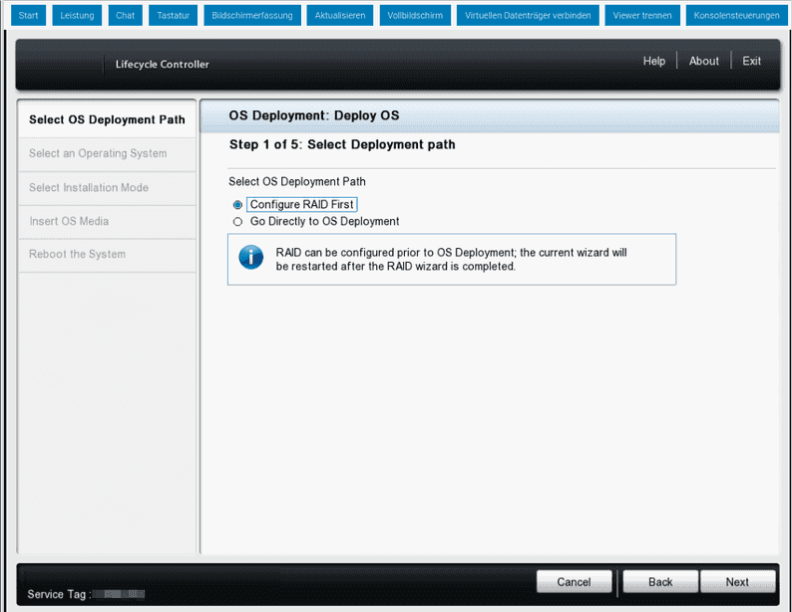
- If you have not yet configured a RAID, you can now configure it by using this wizard. If a RAID already exists on your server, please select
Go Directly to OS Deployment.
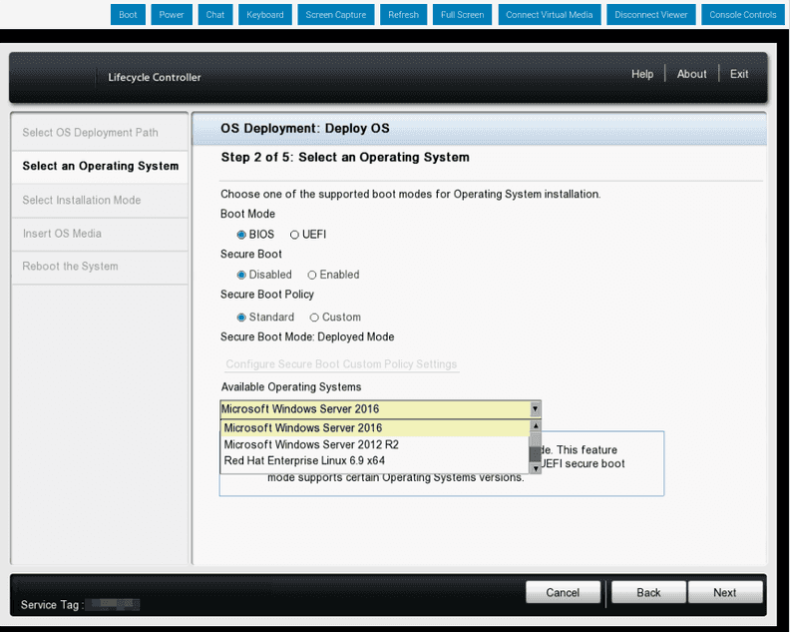
- In the next step, select whether you want to install the operating system in BIOS or UEFI boot mode. Then select the operating system you want to install from the dropdown menu.
- If you choose the UEFI mode, you can also select whether you want to use
Secure Bootor not. - Now click on
Next, and the server will collect the drivers required for installation.
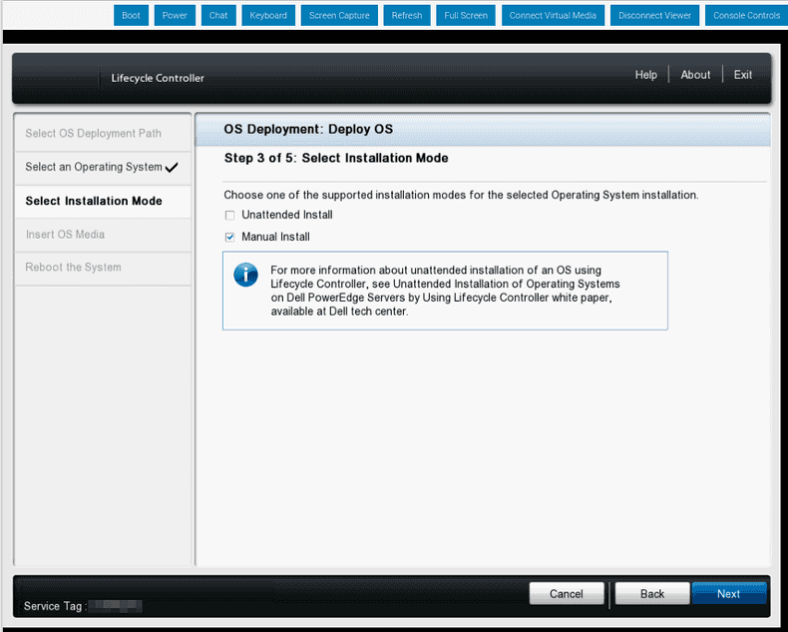
- In the third step, select
Manual Installand click onNext. Then, the DELL server will validate the operating system image.
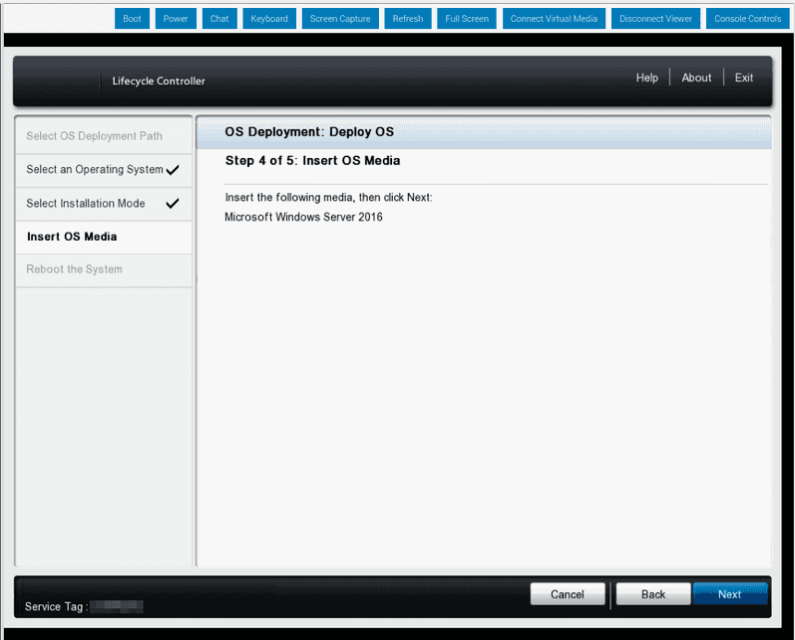
- In the fourth step, simply click on
Nextbecause the image was previously integrated via the iDRAC.
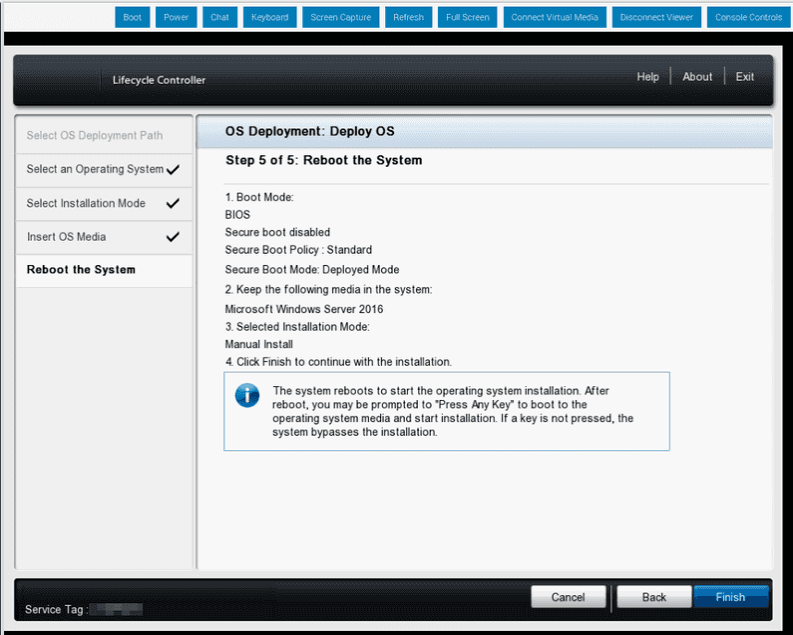
- In the fifth and last step, you will see an overview with the selected settings. Click
Finishif the settings are correct. Then the server will reboot and will start the Windows setup.
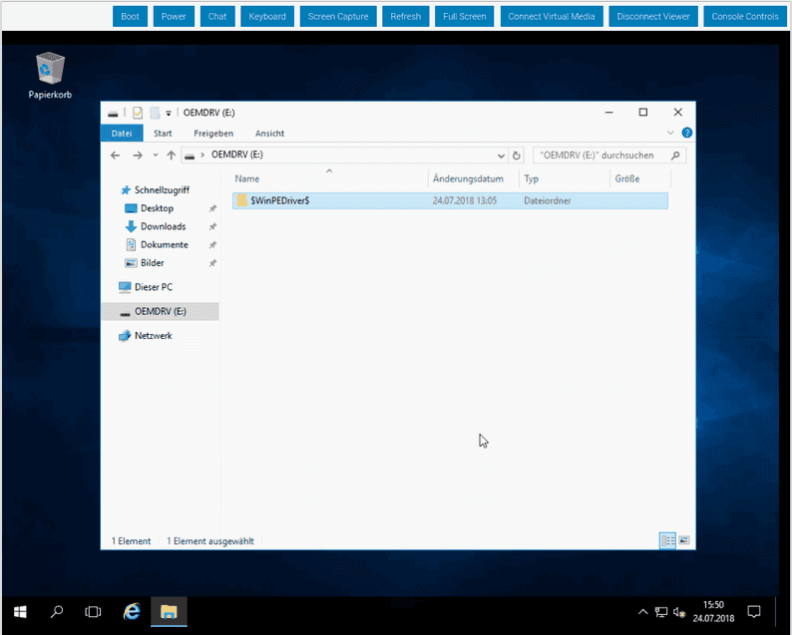
OEMDRV by the server.


