To accomplish this task, you need to edit the operating system’s registry. Registry editing is done using a registry editor program, which you can launch by typing the ‘regedit’ command in the PowerShell console.

Next, you need to locate the RDP-Tcp section. The path to the section is as follows: HKEY_LOCAL_MACHINE -> SYSTEM -> CurrentControlSet -> Control -> Terminal Server -> WinStations -> RDP-Tcp:
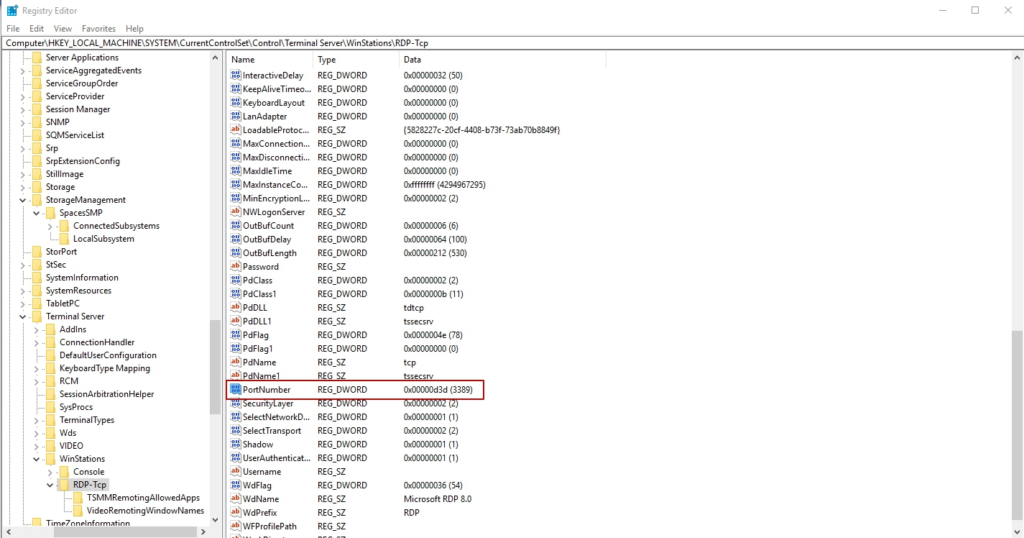
Then, open the PortNumber item. Next, switch to the decimal input format and set a new port for RDP connections.
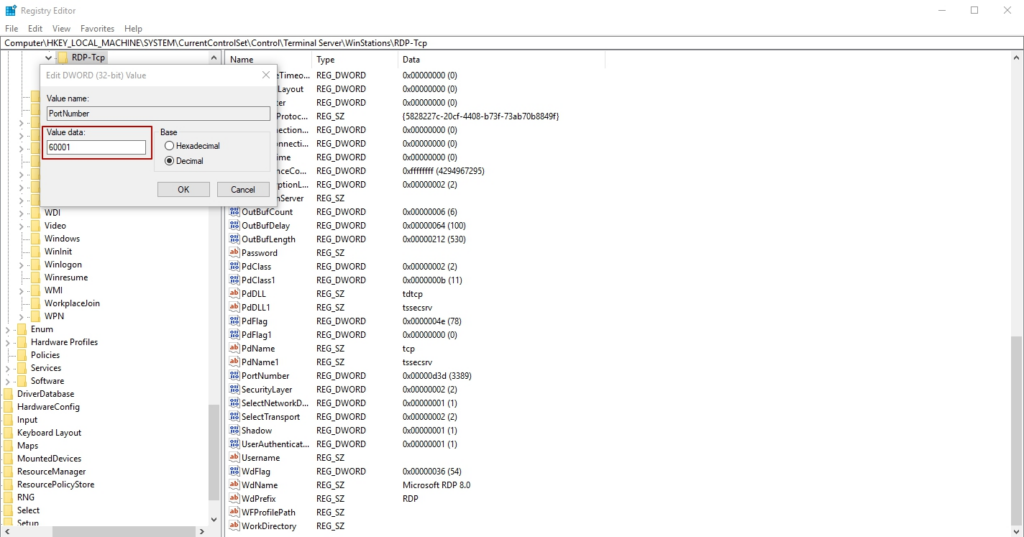
When choosing a new port for the connection, remember that there are several categories of ports based on their numbers:
- Ports from 0 to 10213 are well-known ports assigned and controlled by the Internet Assigned Numbers Authority (IANA). Typically, these are used by various OS system applications.
- Ports from 1024 to 49151 are registered ports assigned by IANA. They can be used for specific tasks.
- Port numbers from 49152 to 65535 are dynamic (private) ports that can be used by any application or process for their work.
After changing the connection port, it’s essential to create a rule for the new port in Windows Firewall.
Note: If you don’t create a rule in Windows Firewall, you won’t be able to connect to the server via RDP.
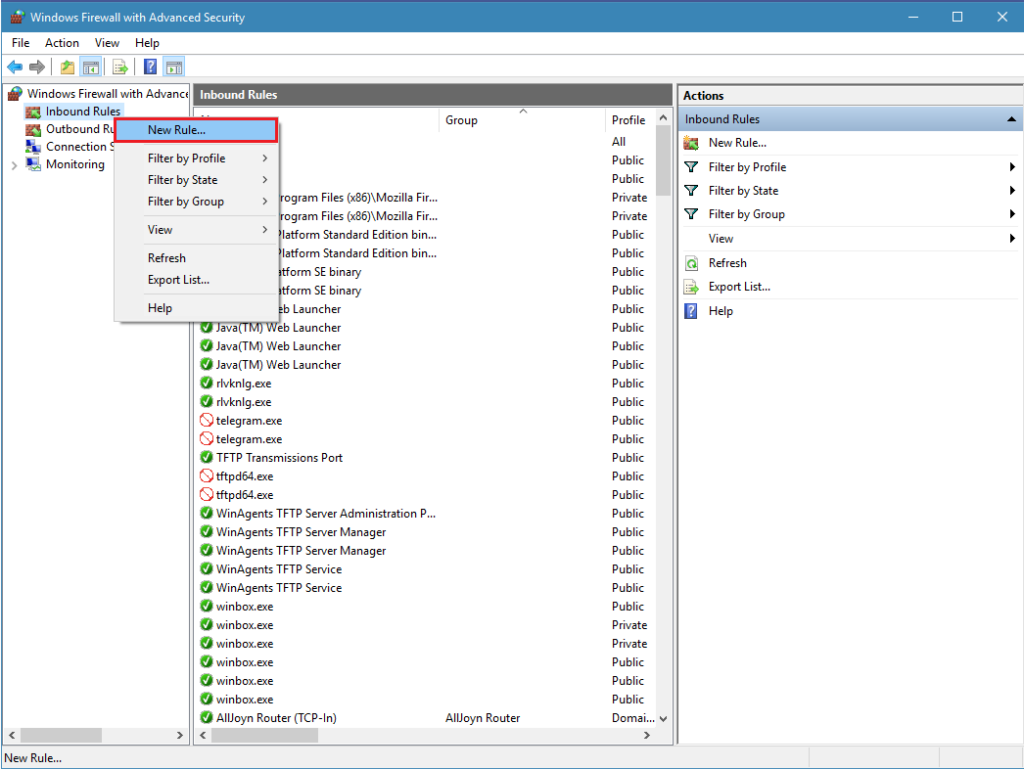
Create a new rule.
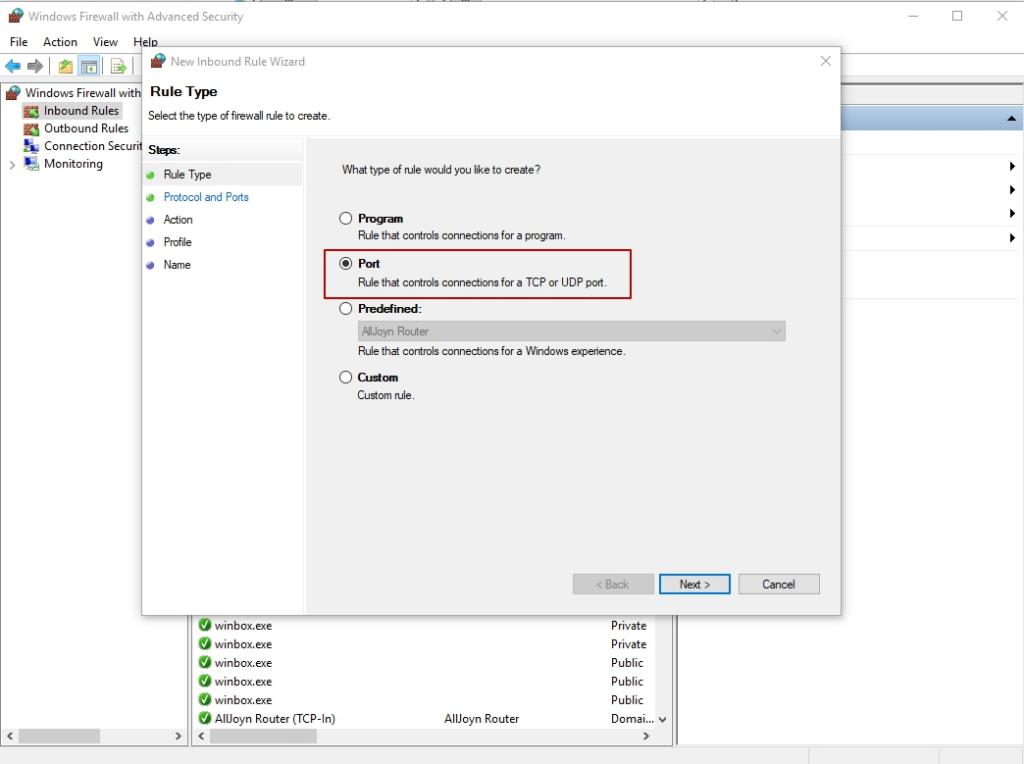
Select a port rule.
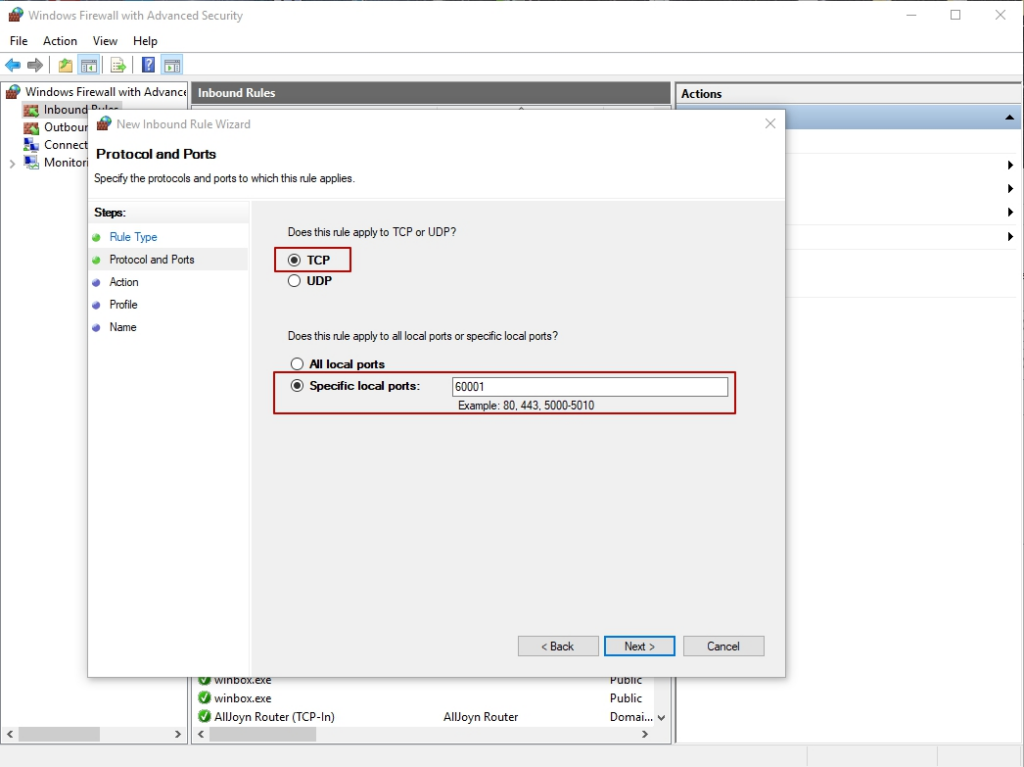
Choose the TCP protocol and specify the port you set while editing the registry (in our example, the port number is 60001).
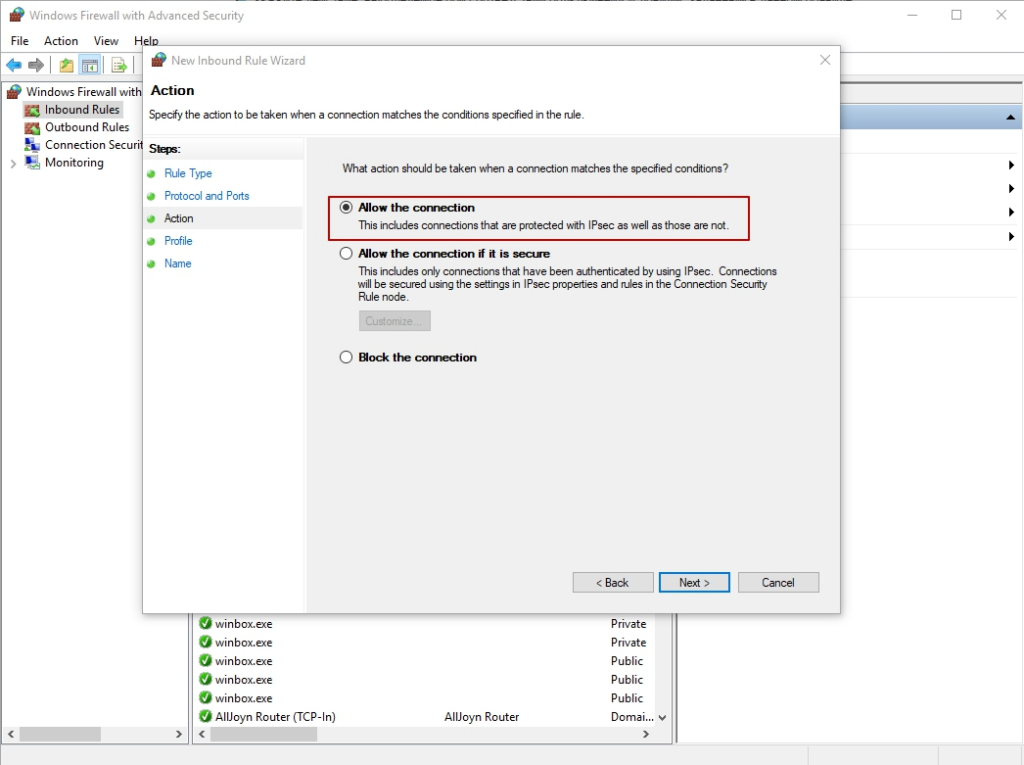
In the next step, select the action type that describes the rule. Allow the connection.
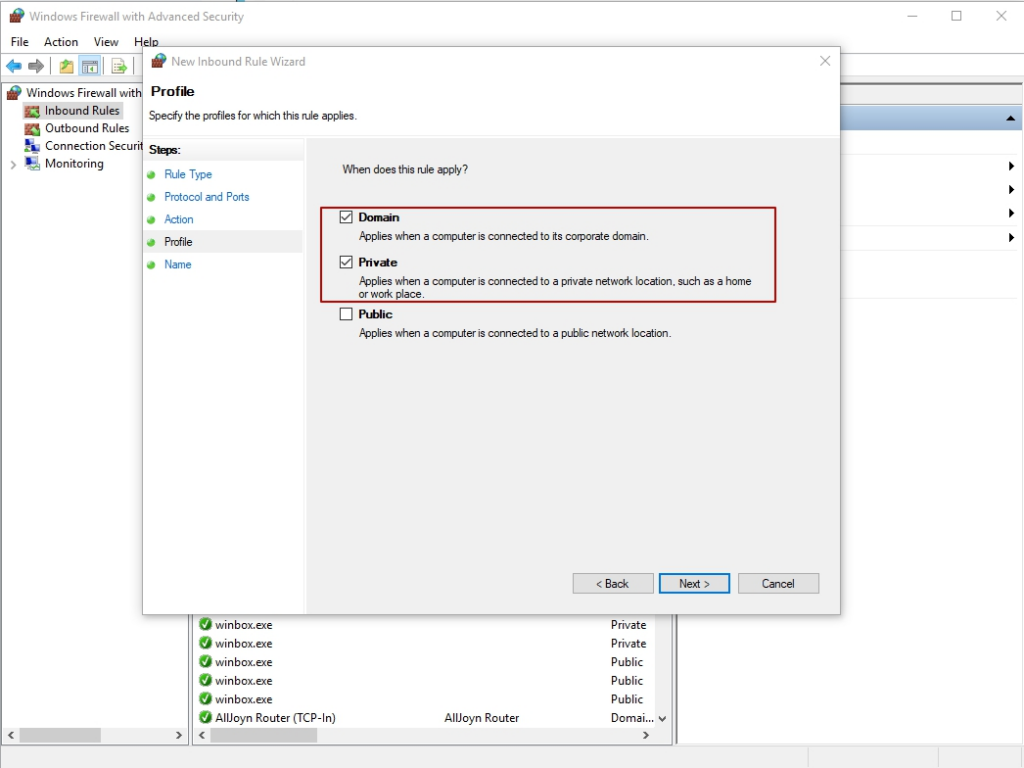
You need to specify the scope of the rule on the following step, which depends on where the server operates (workgroup, domain, or private access).
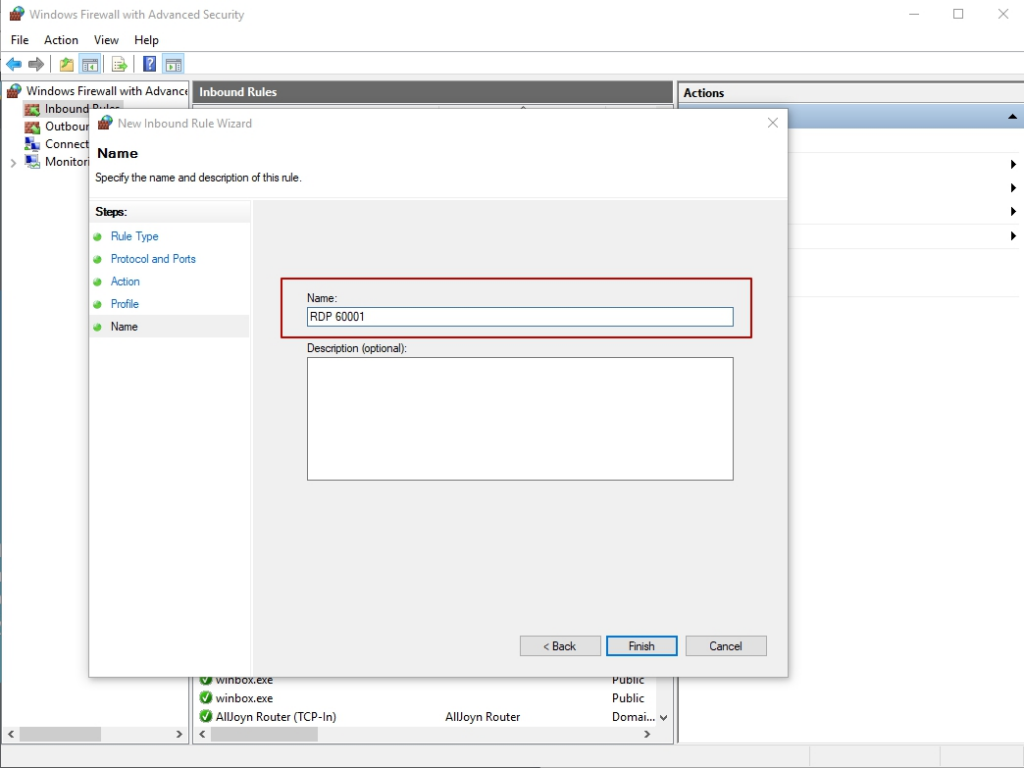
In the final step, you need to choose a name for the rule.
Reboot the server.
Now, when connecting to the server via RDP, use the new port. You should specify it immediately after the server’s IP address, separated by a colon.


